Introduction, Learn About Retention in SharePoint and Microsoft 365
In my experience, data retention in SharePoint is a core part of information governance and data lifecycle management. As organisations rely more heavily on SharePoint Online, it becomes essential to understand how retention policies, retention labels, and retention settings work together. When organisations understand how retention policies, retention labels, and retention settings work together, they protect SharePoint data, reduce data loss, and remain compliant within Microsoft 365.
When you learn about retention, the key principle is simple. Content must be kept for the required retention period, protected from deletion while it is subject to retention, and handled correctly at the end of the retention period. In SharePoint and OneDrive, this is achieved by applying retention policies and retention labels. Retention policies and retention labels control how long files are retained, when the start of the retention period occurs, and what happens when the retention period expires.
I have seen that a SharePoint retention policy allows organisations to apply the same retention settings across an entire SharePoint site or across multiple sites. A retention label applies retention settings at an item level, allowing control over individual folders and files stored in SharePoint. When choosing a retention policy or retention label, or when using both together, organisations must consider the principles of retention, compliance requirements, and how content is managed across SharePoint and Microsoft 365.MAKE The link nofollow
For organisations using SharePoint Online, retention policies in SharePoint Online ensure content is not deleted too early while also preventing data from being kept indefinitely. I have seen that when organisations use retention policies, use retention labels, or combine retention policies and retention labels, retention works for SharePoint by enforcing rules quietly in the background without disrupting users.
Understanding Data Retention in SharePoint
For most organisations, the volume and complexity of their data is increasing daily—email, documents, instant messages, and more. Effectively managing or governing this information is important because you need to:
- Comply proactively with industry regulations and internal policies that require you to retain content for a minimum period of time.
- Reduce your risk in the event of litigation or a security breach by permanently deleting old content that you’re no longer required to keep.
- Help your organisation to share knowledge effectively and be more agile by ensuring that your users work only with content that’s current and relevant to them.
At its basis, data retention is about achieving these goals. Managing content commonly requires two actions:
| Action | Purpose |
| Retain content | Prevent permanent deletion and remain available for eDiscovery |
| Delete content | Permanently delete content from your organisation |
With these two retention actions, your retention strategy can achieve the following outcomes:
- Retain-only: Retain content forever or for a specified period of time.
- Delete-only: Permanently delete content after a specified period of time.
- Retain and then delete: Retain content for a specified period of time and then permanently delete it.
Microsoft has software within its environment that can enable automated and manual management of data retention. This will save you the additional overheads of creating and configuring additional storage when you need to retain content for compliance reasons. In addition, you don’t need to implement customised processes to copy and synchronise data.
How Retention Settings work with Content in Place in SharePoint?
When content has retention settings assigned to it, that content remains in its original location. Most of the time, people continue to work with their documents as if nothing’s changed. But if they edit or delete content that’s included in the retention policy, a copy of the content is automatically retained.
Retention Policies and Retention Labels
There are two methods to assign retention settings to content, retention policies and retention labels with label policies.
Use a retention policy to assign the same retention settings for content at a site level, and use a retention label to assign retention settings at an item level (folder, document, email).
Retention policies
You can very efficiently apply a single policy to multiple locations, or to specific locations.
For the start of the retention period, you can choose when the content was created or when the content was last modified.
Items inherit the retention settings from their container specified in the retention policy. If they are then moved outside that container when the policy is configured to retain content, a copy of that item is retained in a secured location. However, the retention settings don’t travel with the content to its new location. If that’s required, use retention labels instead of retention policies.
Retention labels
Use retention labels for different types of content that require different retention settings.
Retention labels let you apply retention settings for governance control at the item level (document or email).
With retention labels, you can:
- Enable people in your organisation to apply a retention label manually.
- Apply retention labels to content automatically
- Start the retention period from when the content was labeled.
- Start the retention period when an event occurs.
- Apply a default retention label to a document library, folder, or document set.
- Mark items as a record.
Compare capabilities for retention policies and retention labels
Use the following table to help you identify whether to use a retention policy or retention label, based on capabilities.
| Capability | Retention policy | Retention label |
| Retention settings that can retain and then delete, retain-only, or delete-only | Yes | Yes |
| Retention applied automatically | Yes | Yes |
| Automatically apply different retention settings at the end of the retention period | No | Yes |
| Retention applied based on conditions | No | Yes |
| Retention applied manually | No | Yes |
| End-user interaction | No | Yes |
| Persists if the content is moved | No | Yes |
| Start the retention period when labeled or based on an event | No | Yes |
| Audit admin activities | Yes | Yes |
| Audit retention actions | No | Yes * |
| Identify items subject to retention: – Content Search – Data classification page, content explorer, activity explorer | No No | Yes Yes |
Combining retention policies and retention labels
You don’t have to choose between using retention policies only or retention labels only. Both methods can be used together and in fact, complement each other for a more comprehensive solution.
How Long it Takes for Retention Settings to Apply?
When you submit retention policies for workloads and label policies to automatically apply a retention label, allow up to 7 days for the retention settings to be applied to content.
Similarly, allow up to 7 days for retention labels to be visible in apps after you publish the labels.
Often, the policies will take effect and labels will be visible quicker than 7 days. But with many potential variables that can impact this process, it’s best to plan for the maximum of 7 days.
7 Steps on How to Set Up a SharePoint Retention Policy
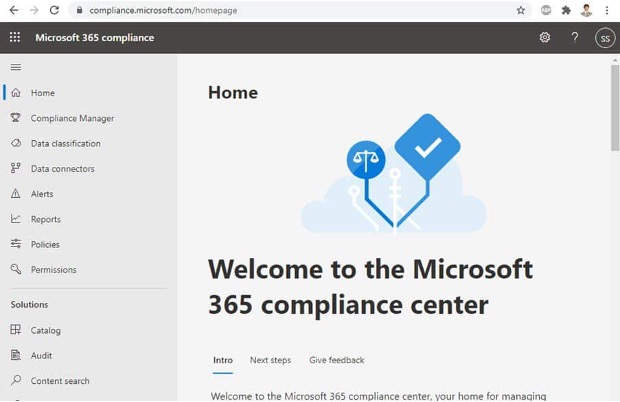
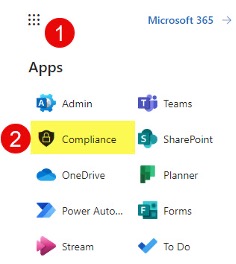
Step 1: Open the Microsoft Office 365 Compliance Center
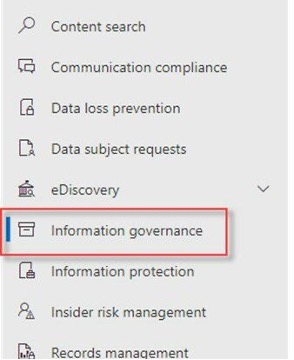
Step 2: On the left navigation menu select Solutions / Information governance
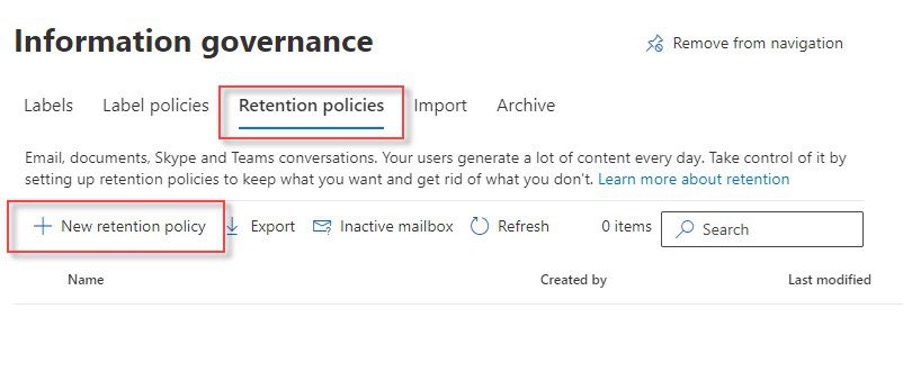
Step 3: Open the Retention Policies tab and then click on “+” to create a new retention policy
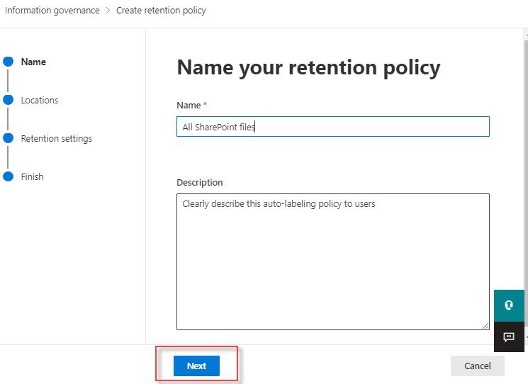
Step 4: Enter the policy’s name, description, and click Next
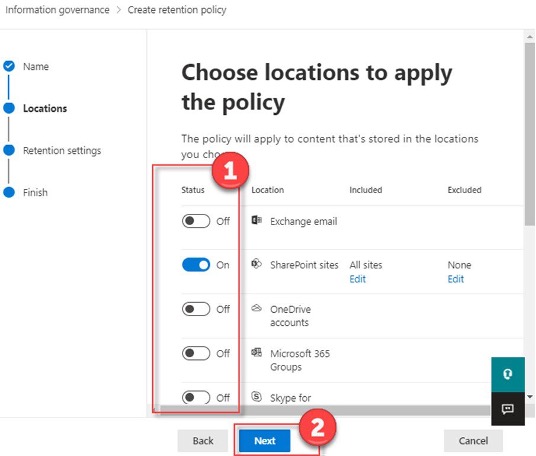
Step 5: Uncheck all locations except SharePoint
Step 6: Select the period of retention and what you wish to be done with the data at the end of the retention period.
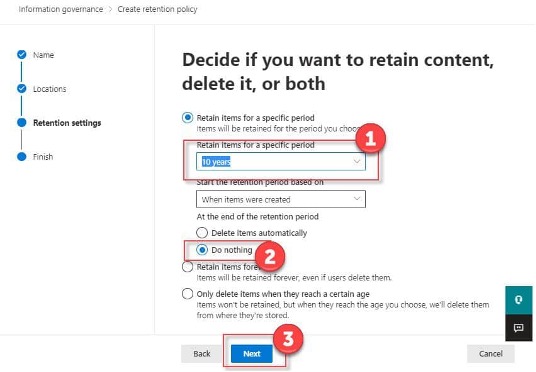
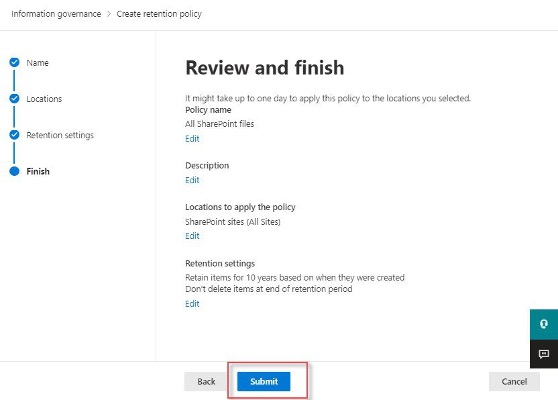
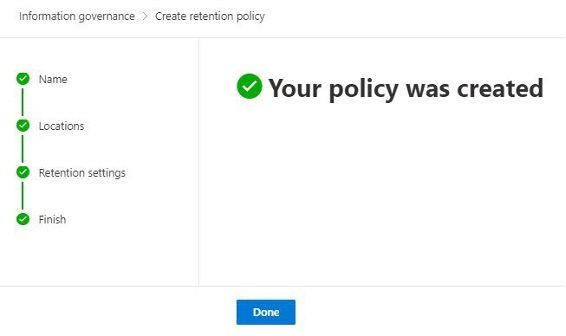
Step 7: Verify settings and click Submit to create your SharePoint Retention policy
3 Steps to Set up Document Retention via Retention Labels
There are three steps involved when it comes to setting up document retention via retention labels in SharePoint.
- Step 1: Create Retention Labels (specify the retention period)
- Step 2: Publish Retention Policies (specify which sites the retention labels will be published to)
- Step 3: Tag the content with Retention Labels
Step 1: Create Retention Labels
The first step in the process is to create a Retention Label. The label will define the retention period + retention behaviour.
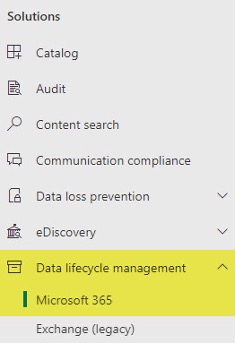
- From Microsoft 365 App Launcher, click Compliance
- Under Data lifecycle management, click Microsoft 365
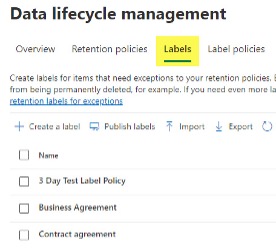
- Click on the Labels Tab. This is where you can create/define retention labels.
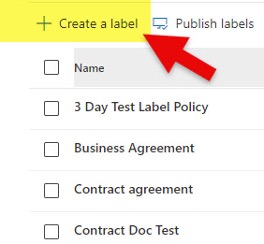
- Click Create a label
- Give the Label the name. Click Next.

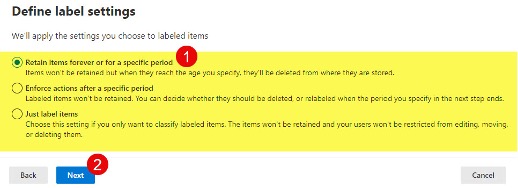
- On the next screen, you can define label settings. Click Next.
- On the next screen, we will define the Retention Period. In addition, you have to specify from which date the clock starts to count the retention. Click Next.

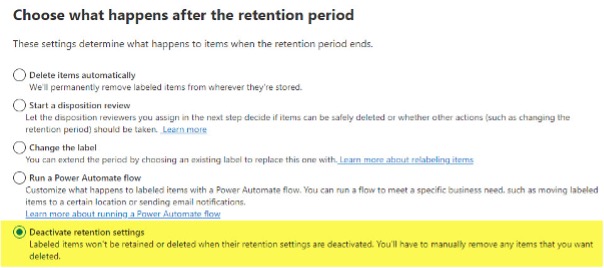
- Next, we need to choose what happens after the retention period expires.
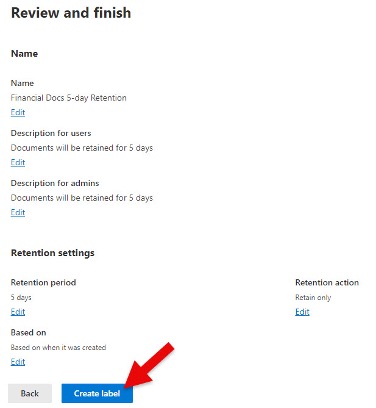
- On the final screen, you can review the settings, and if everything looks good, click Create label.
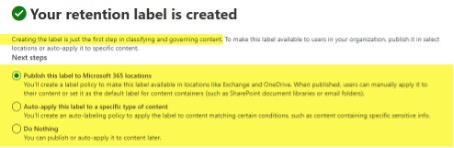
- You will then receive a confirmation message.
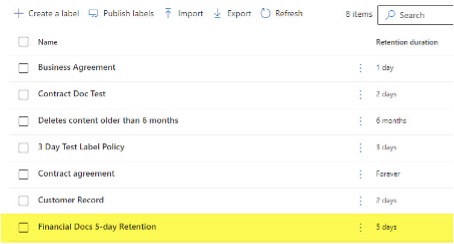
- The label will appear in the dashboard/list of labels
Step 2: Publish Retention Policies
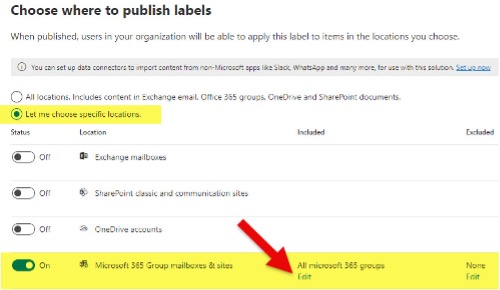
Now that the label has been created, it can be published. When published, we make it available to certain SharePoint sites, so that users can apply those labels to content on those sites.
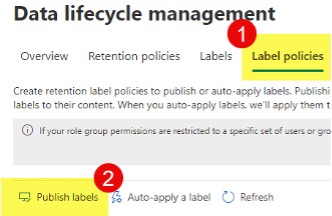
- While in the Data lifecycle management screen, click on Label policies.

- Click on Publish labels.
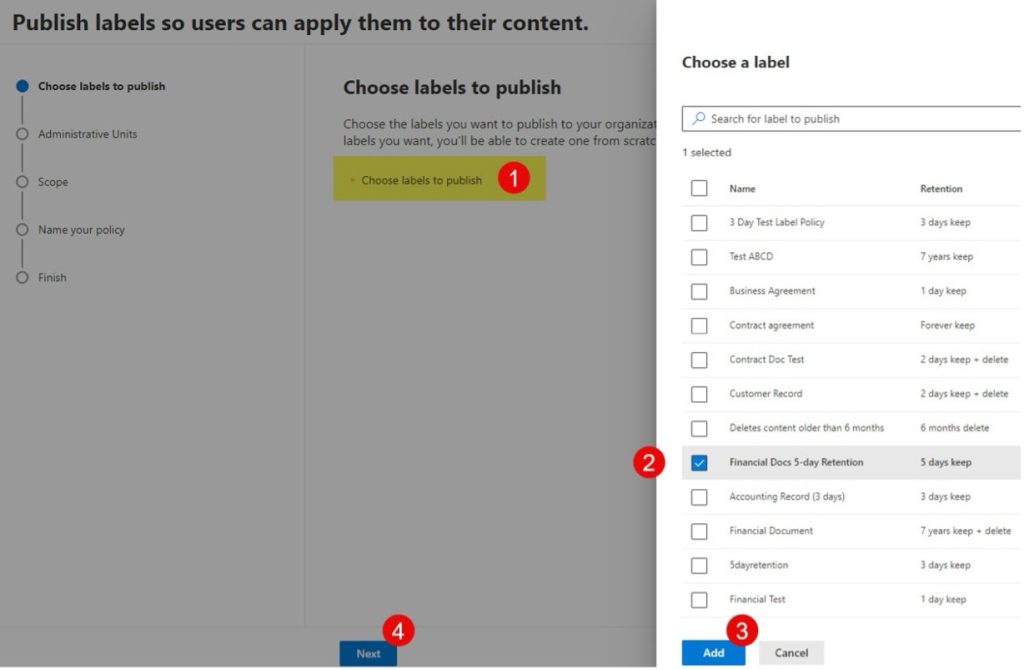
- On the next screen, choose a label to publish. Once chosen, click Next.
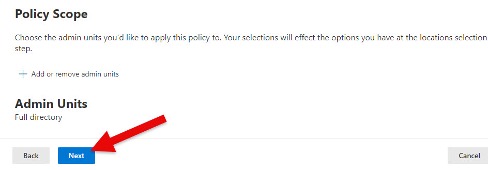
- The next screen is optional and only applies to large organisations. This is where you can select Admin Units. Admin Units make sense if you have large organisations and have different compliance officers responsible for different regions/SharePoint sites.
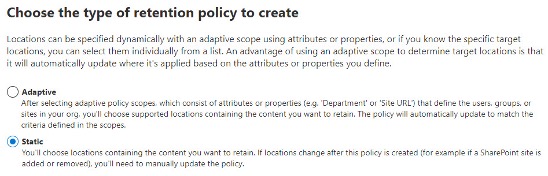
- On the next screen, you must choose the Retention Policy type to create. You can choose between Adaptive and Static Scope. With Static Scope, you will have to choose specific Sites/URLs to publish the labels to. With Adaptive Policy Scope, you will be able to specify sites based on site attributes like Site Title, Site URL, etc.
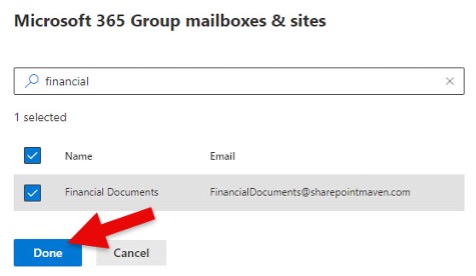
- On the next screen, you can choose locations to publish.
- Once the Site is chosen, click Done.
- Click Next to proceed to the next screen.

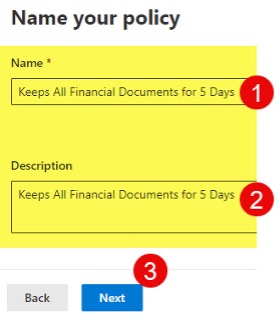
- Finally, give the Policy a name. Click Next.
- On the final screen, review the settings. If all looks good, click Submit.
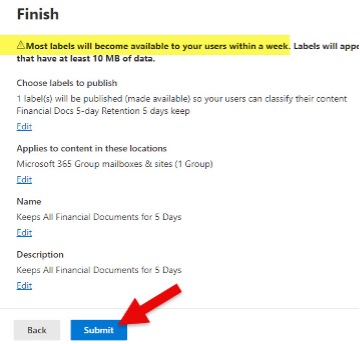
- You will then get a confirmation message telling you it might take a week to have the labels published. In reality, it might be just a day or two.

Step 3: Tag the content with retention Labels
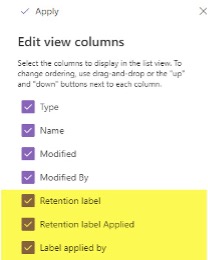
- Prior to tagging the documents with retention labels, it is recommend that the below 3 labels to the library view: Retention label, Retention label Applied, and Label applied by.
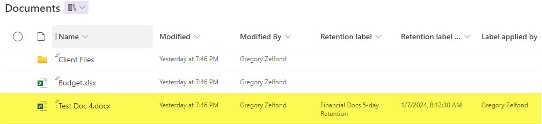
- To tag a document, click on the checkbox next to a document, then “i” in a circle, then choose the proper retention label under the Apply label section.

- The document will now be tagged with a label.
Step 3 a: Tag folders with retention Lables
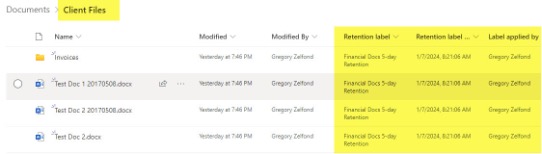
- You can apply the retention label to both a single document or an entire folder.

- If you apply a retention label to a folder, it will also apply/propagate to the contents of the folder (other files and folders inside the labeled folder).
Simplifying Data Retention in SharePoint for Your Business
Effective data retention in SharePoint is not just about compliance—it’s about enhancing your organisation’s agility and reducing risk. By leveraging retention policies and labels, you can control how long content is kept and ensure that it’s securely deleted when no longer needed. Whether you’re dealing with regulatory requirements, internal policies, or simply aiming for better knowledge sharing, the tools within SharePoint and Microsoft 365 make it easier to automate and streamline this process.
With the right strategy in place, your organisation can maintain control over its data, support legal and business needs, and stay ahead in managing content efficiently. Insight IT can help guide you through the setup and best practices for data retention, ensuring your business remains secure and compliant.
FAQs
What does the system do when a user tries to delete a document that is under retention?
I have seen users attempt to delete a document that is subject to a retention policy or has a retention label applied. In these situations, the user cannot permanently remove the document until the retention period expires. In SharePoint, the document may appear deleted to the user, but SharePoint retains a protected copy of the content.
The system keeps the content subject to retention settings and prevents intentional or accidental deletion during the period in the retention policy. When the end of the retention period is reached, the retention settings to be applied determine whether the content is permanently deleted or retained longer. This behaviour demonstrates how retention policies and retention labels work in SharePoint Online.
Do retention policies affect SharePoint site performance?
No, retention policies do not negatively affect SharePoint site performance. Retention settings work with content in place, meaning files remain accessible and users can continue working normally. Retention works behind the scenes and does not slow collaboration or daily operations.
Even with multiple retention settings or overlapping retention policies, SharePoint retention is designed to scale across Microsoft 365. SharePoint retention also works seamlessly with SharePoint and OneDrive and does not impact performance.
Can retention labels be applied automatically without user involvement?
Yes, retention labels can be applied automatically by using an auto-apply retention label policy. Auto-apply retention label policies assign retention labels that mark items or retention labels that do not mark items based on rules, metadata, or classification conditions.
This approach ensures consistent governance, reduces data loss, and keeps content that is subject to retention across SharePoint and OneDrive without relying on user action.
Are retention policies visible to end users?
In most cases, retention policies are not visible to end users. Users may see messages about retention policies only when an action is blocked, such as attempting to delete content that is subject to retention settings. In contrast, retention labels can be made visible so users can manually apply a retention label where required.
This separation allows organisations to choose between using retention policies only, retention labels only, or a combination of both depending on governance needs.
Is data retention in SharePoint suitable for small businesses?
Yes, data retention in SharePoint is well suited to small businesses. Microsoft 365 retention tools are built directly into SharePoint Online, allowing organisations to create a retention policy, configure a retention policy, or deploy a new retention policy without additional systems or infrastructure.
I have seen small businesses benefit from automated governance, reduced risk of data loss, and consistent retention across files stored in SharePoint. Businesses can manage days for the retention, enforce the seven days for the retention processing window, and control days for retention labels. SharePoint and Microsoft 365 provide retention capabilities that are scalable, cost effective, and suitable for growing organisations.